Share
Pin
Tweet
Send
Share
Send
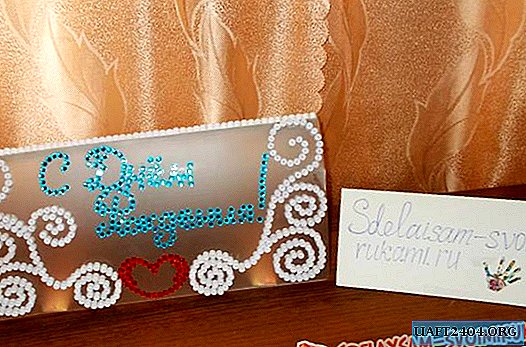

We will need such materials and tools:
- Pencil and eraser;
- Glue and scissors;
- tweezers;
- Whatman or a large long plastic sheet;
- White paper for quilling (you can take office);
- Rhinestones or sparkles;
- Scotch tape and (or) super glue;
- A pen with blue ink;
- A plastic empty box under the CD.
1. Getting started, you need to take a paper or a large sheet of plastic, if there is no paper, and cut an even square out of it:


2. After that, we need to bend the sheet in half and make drawings (sketches) of future postcard patterns on it:

3. Now we need to take two or three sheets of white paper and carefully cut them into strips, which then need to be twisted into round shapes of tubes:

4. The resulting figures must be glued to the sheet. It will be convenient to use tweezers so that the glue does not stick to your hands:

5. In order to “highlight” the record on a future postcard, you can use gilded sparkles or rhinestones, which can be bought in a special store:

6. Next, we need to cut out two or three wide rectangular strips of paper and attach them to the bottom of the future postcard to connect both sides of it. You need to connect them because when a lot of paper figures are glued to both sides of the card, then under their weight the sheet will fall and fall:

7. For each of the paper strips glued from below, measure the length and then peel them off:

8. Next, we take an empty plastic box from under the CD and cut out two rectangular strips of the same length and width, after which they need to be covered with transparent varnish or pasted with tape. Here it is advisable to use scissors for metal and, if the background on one of the sides is not suitable, it can be hidden behind white paper:

9. The resulting strips must be glued to the card from below; You can use super glue or scotch tape for this:

10. We decided to make the image of the heart from a red rhinestone. So we got the front side of the card:

Dark spots disappeared from the surface of our plastic sheet, formed after wiping it with a damp cloth:

11. On the reverse side, we first wanted to make a frame of large quilling figures, but after that we decided that it would look neater and better if we made it from small ones. In the center of the sheet, we recorded a congratulatory text in poetic form, first planning to make it out of gilded sparkles:

12. But there was no sparkle, and we decided to make it simply on paper with blue ink. We cut out four rectangular shapes from white paper (we need to make as many rectangular shapes as there are lines in our poem). In the lower side of each of them you need to draw a straight line with a ruler and a pencil in order to get the text exactly:

13. Now you need to turn the sheets over, and on the clean side do the recording. Here you can clearly see the line drawn on the back. First, we make a note with a pencil so that we can erase it if the text is uneven and write with a pen:

Next, erasing the text, do it with a blue pen:

14. Now the sheets with the text can be glued to the card and decorate:

You can decorate in different ways, to your taste:

After the glue has dried, the card will be ready:

It will be possible to give it to a loved one for his birthday and she will be able to decorate any room pretty well:

Share
Pin
Tweet
Send
Share
Send

