Share
Pin
Tweet
Send
Share
Send
To work, you will need:
- paper.
- glue stick.
- universal glue "Titan".
- scissors.
- wallpaper.
- rain for the Christmas tree.
In order to transgress to work, we will prepare templates. One pattern will be with round petals and the other with pointed edges. On A4-sized sheets, we place the templates on almost half the sheet. For a basis we take a CD disk, we put it in the middle and around it we outline petals.


For the pen, we need a strip of paper measuring 2x30cm.

According to the patterns, we cut out the necessary parts for the basket from paper. Also, from the prepared wallpaper, we cut out two details of each type. They will glue the paper on both sides.


Take a CD and draw a pencil or pen around the edges for the base.

We cut with scissors between each petal to the edge of the base contour. And bend each petal inward, to the middle of the base.


Using the universal glue "Titan" we glue the petals together.


Then we glue the strip intended for the handle of the basket. We fix it at an equal distance from each other.


Now it's time to stick the rest to the basket. The base is placed in the middle of the workpiece with pointed petals. And glue well.

We proceed to decorating and decorating the baskets. For this we need wallpaper. We cut out of them four squares measuring 10 x 10 cm. We will make a flower out of them.

Take a square and fold it in half.


Then fold again in half.

The resulting triangle is folded again in half.

From the resulting triangle you need to make a petal. Scissors peel off the upper corners of the workpiece, giving it an oval edge. Then we unfold it, and we get a blank with 8 petals.


With the rest of the squares we do the same.

We prepare our blanks for further work. To do this, take the scissors and cut the first pattern from one petal to the middle. At the second blank we cut one petal. From the third we cut two, and the fourth 3 pieces.

We begin to create a flower. We take the first template and glue the petals on the cut. Glue one on the other. By the same principle, glue the rest of the workpiece.


We prepare the rest of the templates.

We begin to collect the flower from the prepared blanks.


On each blank we cut the bottom of the resulting cone. But just a little bit. And we continue to collect the flower by gluing together the blanks with universal Titan glue. In this case, the petals are staggered relative to each other.


We take a knitting needle or skewer and twist the petals on each row of the flower.


Now from the wallpaper we cut a small circle with a diameter of 2 cm. And glue it to the bottom of the flower.


Then we take a Christmas tree rain and make a small bunch of fluffy strands from it. And glue it to the handle of our basket. On top of it we paste a small circle or oval from the wallpaper.

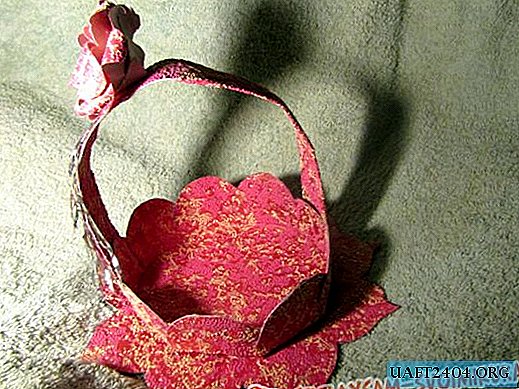
Then glue the flower to a circle or oval in the rain. That's all our paper basket is ready.

Good luck to all.
Share
Pin
Tweet
Send
Share
Send


